
Written by: Dr. Jacquie Jacob, University of Kentucky

There are two important questions you should ask yourself before starting a small flock of meat ducks:
- What do you want to accomplish with a home flock? It is unlikely that you will be able to produce duck products for less than you can purchase them at the grocery store. A home duck flock, however, is a good 4H/FFA or family project.
- Are you up to the challenge of taking care of a flock of ducks for several weeks? Ducks, like all poultry, require daily care every day, including weekends and holidays. Consider the time and effort required for the care of the flock before deciding to start a poultry flock of any kind.
Some additional questions to consider:
Do the local zoning regulations permit you to raise poultry? Laws and ordinances in some communities may prohibit or restrict such activities in your neighborhood.
Do you have the necessary equipment?
- Housing: Ducks need a clean, dry, draft-free shelter that provides at least 4 sq. ft. of space per duck. Ducks do not need water to swim in but do require fresh water to consume. They drink a lot of water, resulting in very watery manure that must be cleaned on a daily basis. Ducks also like to splash in the water, so it is important to have a waterer that limits spillage.
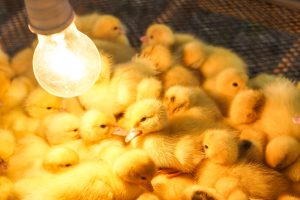
- Heat source: Ducks require a heat source, such as a heat lamp.
- Bedding material: Ducklings need some form of bedding or litter to help keep them warm and to absorb moisture. Wood shavings, sawdust, or rice hulls are good litter choices. The floor of the duck pen should be covered with a layer of litter at least 3 to 4 in. deep. All the caked litter should be removed every day. Also, the rest of the litter should be turned or stirred up once a day to make it absorb more moisture and last longer between changes. Change the litter weekly, depending on the dampness of the bedding. Never place ducklings on slick surfaces such as cardboard, plastic, or newspaper. The smooth surface may result in leg problems, such as spraddle leg.
Is the housing at sufficient distant from neighbors to prevent them from being disturbed with any noise, odor, or flies that might be generated? Use care in siting and constructing housing for your ducks, and develop a plan for manure management that will prevent odor and pollution problems.
Are you able to butcher your ducks yourself or is there a facility nearby where you can pay to have the birds butchered? There are very few custom poultry-processing facilities and even fewer that butcher waterfowl, so if you cannot process your own ducks, you need to identify a place where you can have them butchered. You will also need to consider the state laws regarding the sale of duck meat.
OBTAINING DUCKS
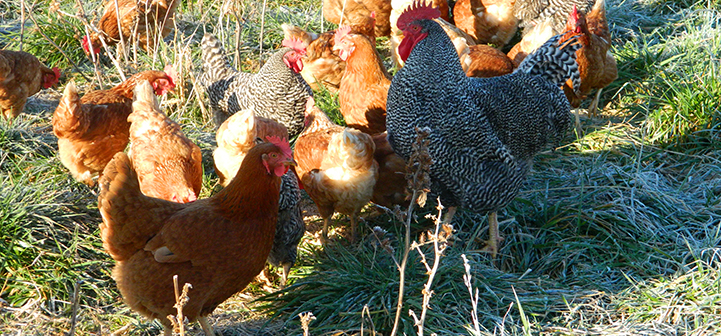
As with chickens, there are some breeds of ducks best suited for meat production and others best suited for egg production. Pekin and Muscovy ducks are typically the breeds of choice for meat production. Some hatcheries sell a “jumbo” Pekin which has been selected for meat production and is not good for exhibition purposes. Muscovy ducks are referred to as ducks, but they are, in reality, a separate species. Muscovy ducks originated in South America and, with the tropical origin, have less fat than the different breeds of ducks. Mule ducks, a cross between Muscovy ducks and another breed, are an alternative option for meat production. Rouen is another breed that can be used for meat production, although they are not as efficient as Pekin, Muscovy ducks, or mule ducks. When selecting a breed, it is important to remember that although Pekin and Rouen ducks cannot fly, Muscovy ducks can.
If you do not have a duck breeder in your area, you can purchase day-old ducklings, in a wide variety of breeds, and have them shipped through the US mail.
PREPARING FOR DUCKLINGS
At least two weeks before ducklings arrive, clean and disinfect the poultry house, feeders, and waterers. Wash the house down with soap and water. Then spray a commercial disinfectant labeled for use in poultry houses. Be prepared for the ducklings at least two days in advance. Put at least 4 in. of litter on the floor of the dry, cleaned, disinfected house. Turn on the heat source to warm up the brooding area so the litter and room temperatures are at the correct level when the ducklings arrive.
Infrared lamps are a convenient, easy-to-use heat source. Use porcelain sockets approved for these lamps, and hang the lamps with a chain or wire (not by the electric cord). Make certain lamps are secured so they cannot fall to the litter and create a fire hazard. The lamps should hang so that the bottoms are 18 to 24 in. from the litter. Lamps can be raised or lowered depending on temperature conditions, and the ducklings will find their individual comfort zones by moving toward or away from the heat source. The use of more than one heat lamp is often recommended, especially during cold weather, so the ducklings will not be without heat if one bulb burns out. Some two-bulb units come with a thermostat, which makes controlling the temperature in the room easier. It is important to remember that you are heating the ducklings and not the air, so air temperature measurements may not be the best guide when using infrared lamps. See the section on temperature below for more information about achieving an appropriate temperature for ducklings.
Feed and water should be ready in the duck pen before the ducklings arrive. The bottom halves of egg cartons make good feeders for the first two to three days; after that, switch to metal or plastic feeders.
CARE FOR DUCKLINGS
The first thing that ducklings need when they arrive, especially if they were shipped through the mail, is water. Dip the bill of each duckling into the water to teach it where the water is. This will prevent ducklings from getting dehydrated.
Temperature
Young ducklings are not able to adequately regulate their body temperature, so they need a source of heat for the first few weeks (referred to as the brooding period). Ducklings should have enough room to move toward or away from the heat source to find their individual comfort zones. For the first week, the ducklings’ environment needs to be in the range of 90°F to 95°F. Reduce the temperature gradually, five degrees each week, until the ducklings are three to four weeks old or until the pen temperature is 70°F. Place waterers a good distance from the lamps to prevent splashing water from cracking the hot bulbs. When using a heat lamp, you can change the brooding temperature by adjusting the height of the heat lamp above the floor. The temperature should be monitored with a thermometer at duckling level and through observation of the ducklings’ response to the heat source. Cold ducklings huddle together under the heat source; hot ducklings move to the outer limits of the brooder space; comfortable ducklings stay in a semicircle around the heat zone. These behaviors can serve as a guide to adjust the brooding temperature when using a heat lamp.
Brooder guard
Construct a cardboard brooder guard, or brooder circle, to keep ducklings near heat, water, and feed, and to prevent drafts during the first week. When the ducklings are seven days old, the brooder guard can be removed to provide the ducklings freedom to move around the pen. Distribute the feeders and waterers around the pen.
Light
Early on, light should be provided 24 hours a day for ducklings. One 40-watt bulb, hung about 6 ft. above the ducklings, is needed for each 200 sq. ft. of pen space. The amount of light per day can be decreased after the first week. It is recommended that the ducklings receive a minimum of six hours of uninterrupted darkness daily.
Equipment
Ducklings must have adequate feeder and waterer space to grow to their maximum potential, and the necessary amount of space increases as the broilers get bigger. There needs to be enough feeder space for all the ducklings to eat at one time. For ducks, feeding is a social activity and they tend to eat as a group whenever possible. For the first two weeks, about 2 in. of feeder space per duckling is required (remember to count both sides of a long, straight feeder). After two weeks, the ducklings will need double this amount (4 in. per duckling). To prevent feed spillage, fill the feeders only halfway. To prevent litter and duck manure from getting into the feeders, raise the feeders off the floor as the ducklings grow. A good rule of thumb is that the height of the feeders should be at the height of a duckling’s back. When switching to a new type of feeder or waterer, leave the old ones in for a few days to allow the ducklings to adjust to the new feeders or waterers.
It is important to keep the feeders and waterers clean. Ducklings also need access to fresh, clean drinking water at all times. Since ducks do not eat as much if they cannot drink, it is important to have adequate waterer space. The waterers need to be cleaned and filled daily with fresh water. As with the feeders, the height of the waterers needs to be raised as the ducklings grow. The lip of the waterer should be level with the height of a duckling’s back.
Ducks do not need water to swim in. If a pool is provided, do not let the ducklings swim for the first three weeks. Ducklings have down, which is not enough insulation to prevent them from chilling except on exceptionally hot days.
Poor air movement in small poultry houses during hot, humid weather can result in excessive duckling mortality, especially when the broilers are approaching market weight. Placing fans in the house to blow air past the ducks will reduce mortality from this problem greatly.
Feeds
Commercial feeds are available that provide the required nutrients for growing ducklings. Do no use medicated feeds. A high-protein diet is typically fed the first two weeks, and then a diet lower in protein is produced. Check with feed dealers to see what types of feeds they have available. A starter mash composed of 22% to 24% protein is usually fed to meat birds for the first four weeks. Many feeding programs then switch to a 20%-protein finisher feed until market time. Meat birds grown on chick starter and developer feeds with lower protein and energy content will not gain weight as rapidly as those on a broiler feeding program. When switching from one type of a diet to another, it is a good practice to mix the two feeds for a few days to provide a slow transition from one feed to the other. Ducks will typically consume 3 lb. of feed for each pound of weight they put on.
KEEPING YOUR FAMILY SAFE
Protect your family from bird-transmitted diseases by following these guidelines.
- Always wash your hands thoroughly with soap and water after handling live poultry, raw meat, or poultry equipment.
- Do not allow toddlers to handle poultry.
- Avoid contact with poultry feces.
- Wash countertops and utensils with hot, soapy water after they have come in contact with raw poultry.
FOR MORE INFORMATION
Raising waterfowl. Phillip Clauer and John Skinner.
Brooding and rearing ducklings and goslings. Glenn Geiger and Harold Biellier, University of Missouri.